How to Upgrade to the Latest Site Search 360 Script Version
To start off 2022 on a good foot, we put everything Site Search 360 has to offer in one bundled file – a single script which will make the maintenance of your search easier than ever before.
Remember how you had to go and manually update the ss360Config object whenever you wanted to change something about your search? Say, change the default colors, enable filters, or upgrade the script itself. Well, with our new Search Designer you won't have to touch your codebase again!
Setting up your Search Designer
The upgrade process is totally free and extremely easy. You’ll just need to follow these four steps:
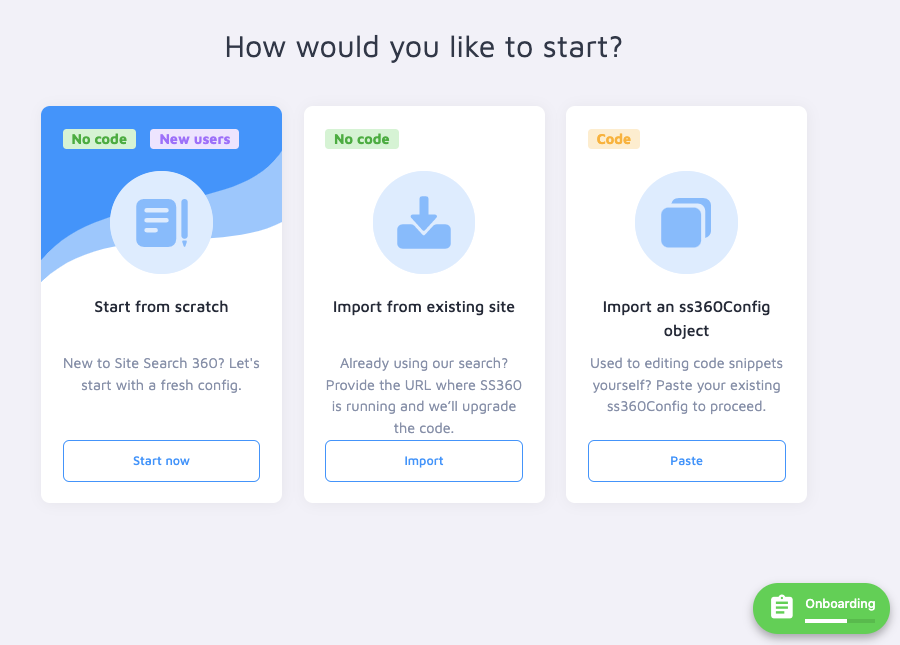
Go to the Design & Publish tab of your SS360 Control Panel with the built-in Search Designer, where the unique setup of your search project is stored. To configure your search, you can do any of the following:
Import from existing site: provide a link to a page on your site where SS360 is already running. For instance, your homepage if you've implemented the search bar anywhere in the header or maybe your search results page (e.g., https://yoursite.com/search-results), and everything that you have configured will be copied to the Search Designer as separate features which you can then adjust at any time.
Start from scratch: perfect if you want to have a blank canvas and total creative freedom to explore all configuration and styling options rather than build upon your existing configuration.
Import an ss360Config object: the most complex option but the one that, as a developer, you have full control of. Like “Import from existing site” it creates your new Search Designer configuration on the basis of the old one, but you’ll need to manually paste your existing configuration.
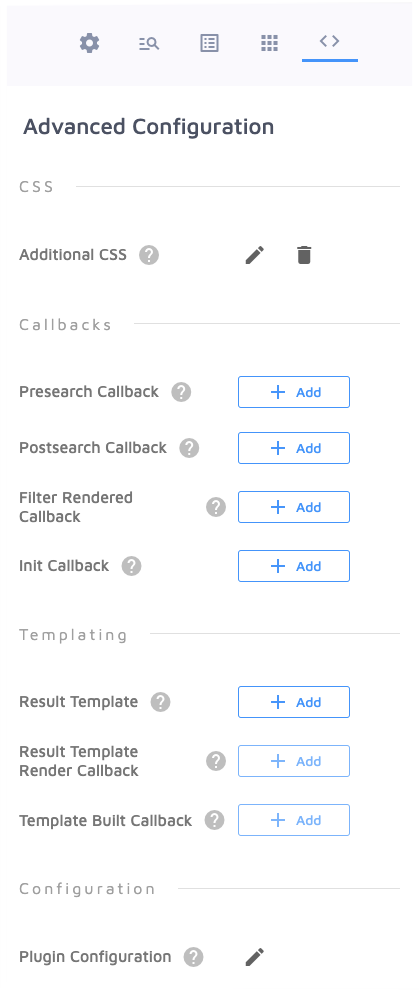
NB: if you have set up any custom callbacks, they won't be imported automatically but you can add them to Advanced Configuration (last tab in the Search Designer's left-side panel).
Try out different settings on the left-side panel. You can add voice search, configure your search suggestions, change the result layout, and more! And you can instantly test and preview the design on the right side of the screen.
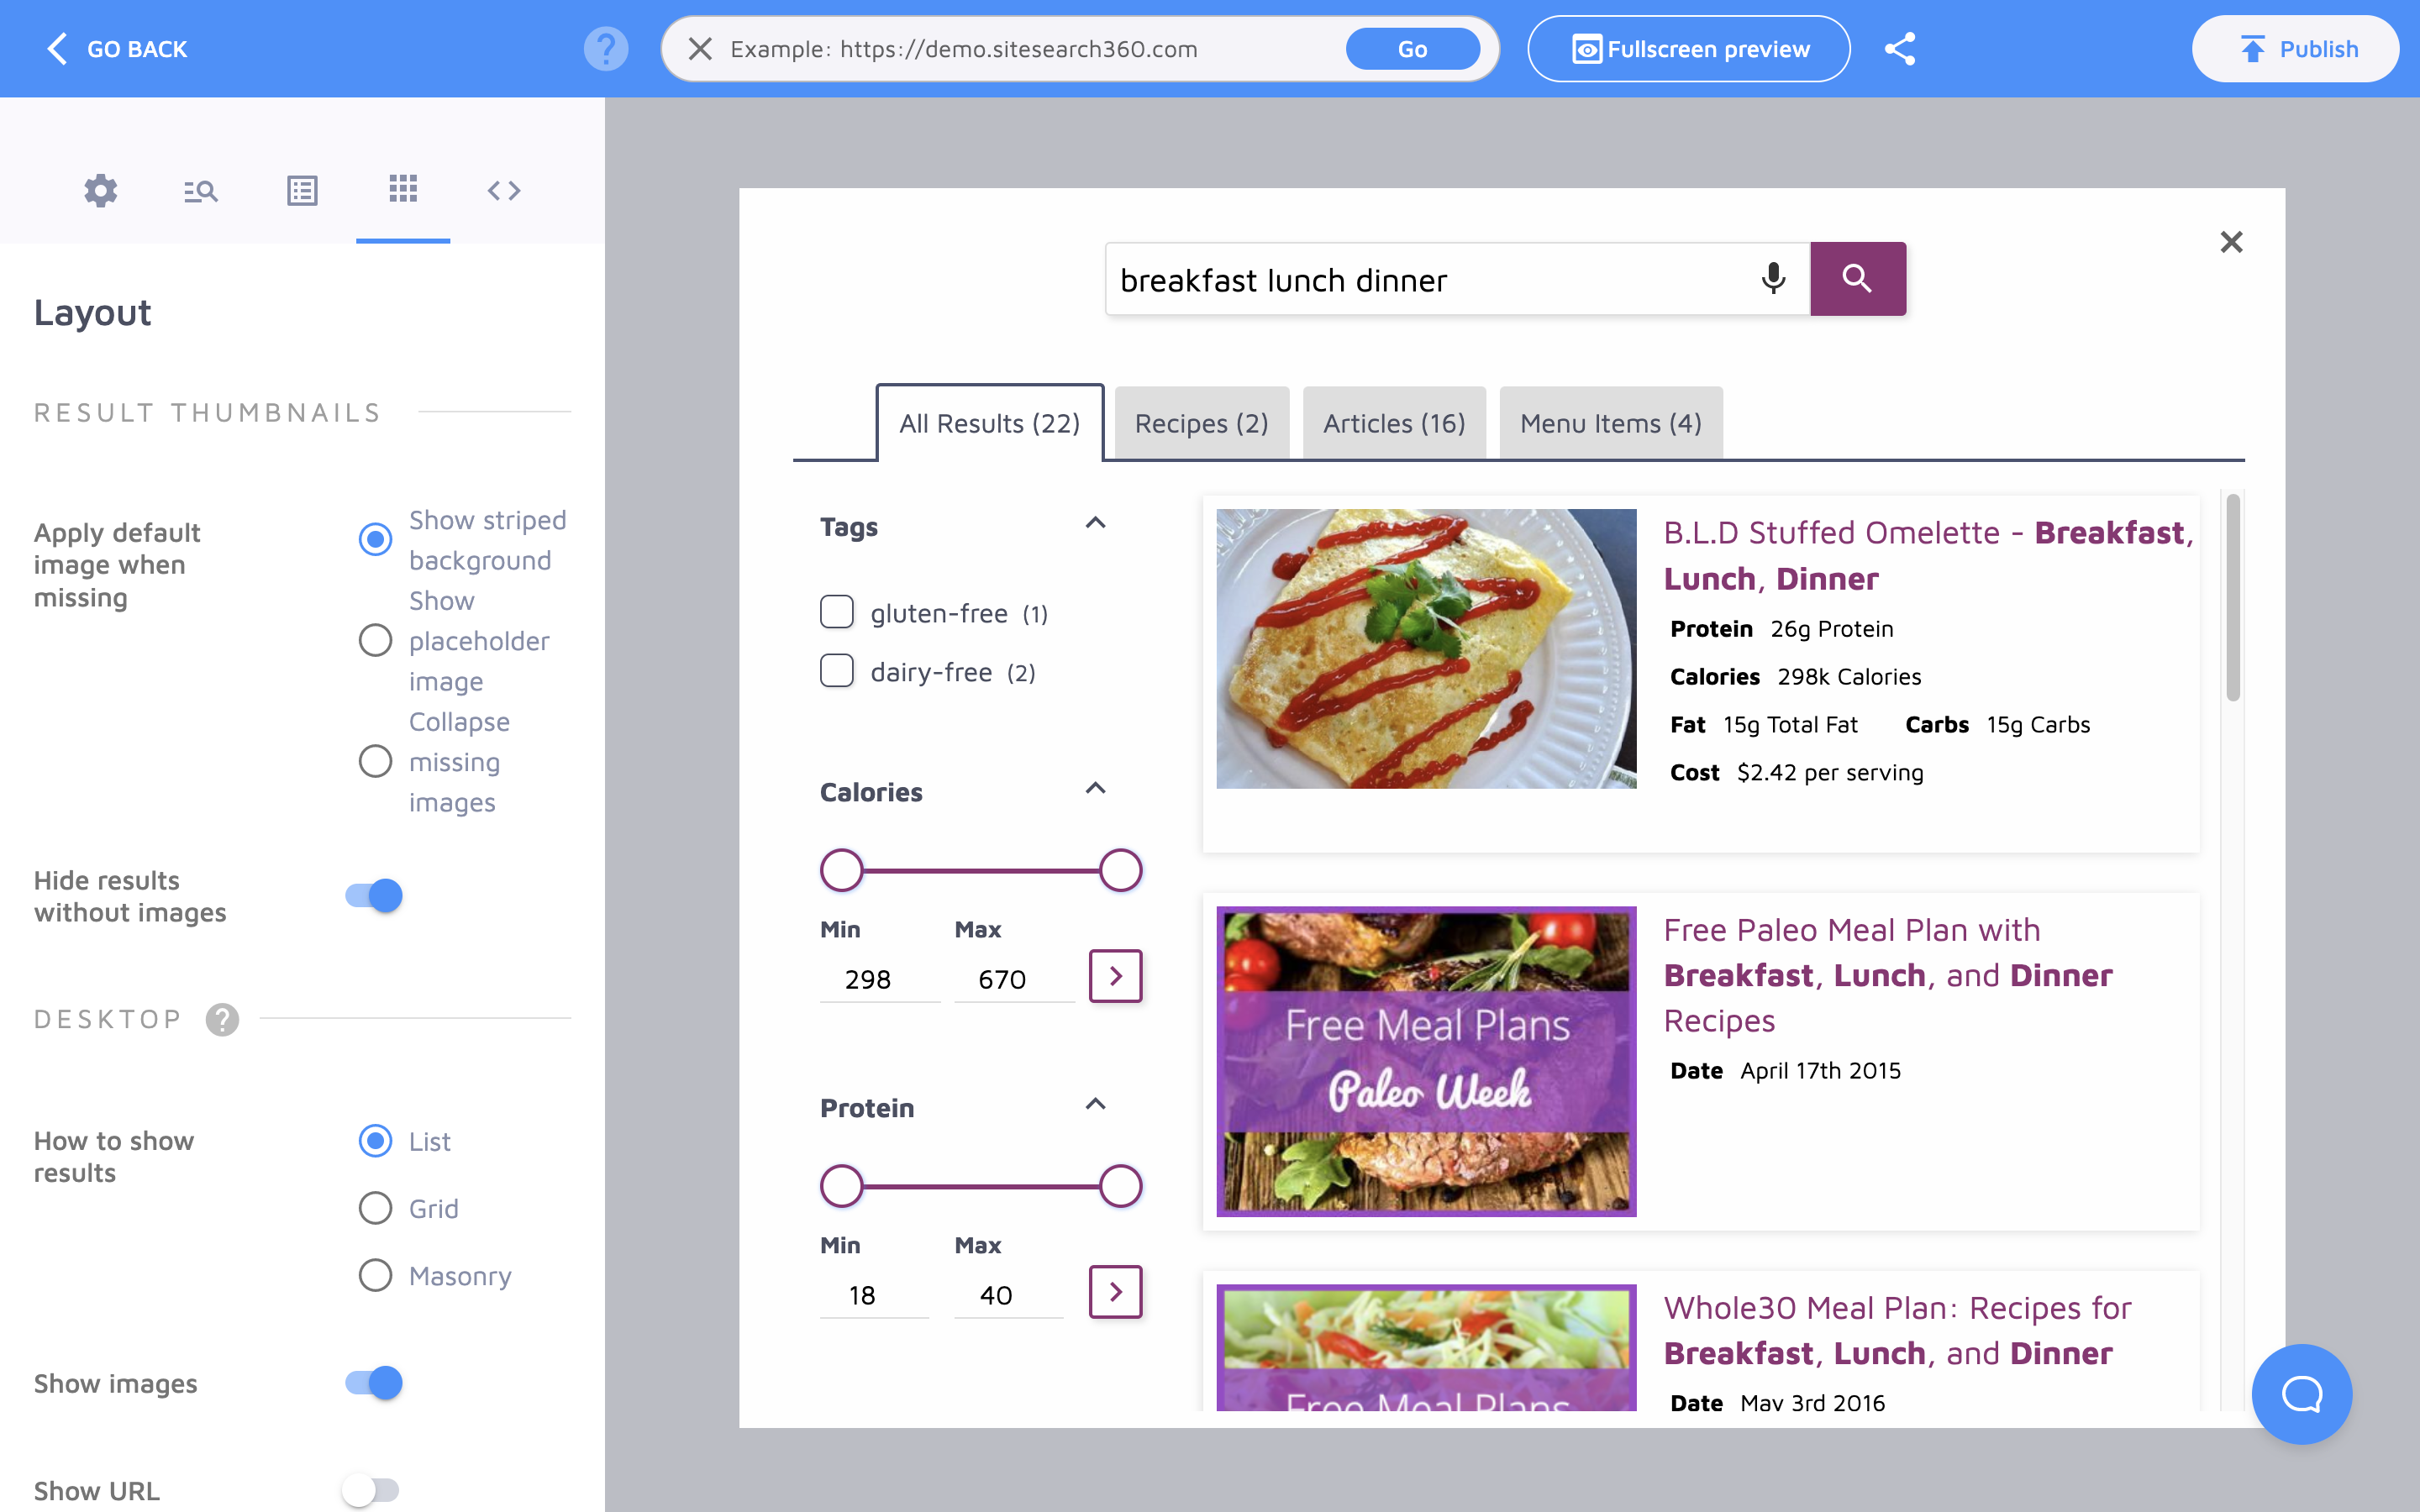
Once you’re done, click “Publish” in the top right corner of the screen to get the new script for your website.
Go to your site and replace the existing SS360 scripts with just one line of our latest JavaScript code (which you won't need to edit/replace ever again).
In the end your script will have to go from this:
<script>
   /* Create a configuration object */
   var ss360Config = {
      /* Your Site ID that usually equals the domain you signed up with */
      siteId: 'mysiteid',
      /* A CSS selector that points to your search box */
      searchBox: {selector: '#searchBox'},
   };
</script>
<script src="https://cdn.sitesearch360.com/v13/sitesearch360-v13.min.js" async></script>
to this:
<script async src="https://js.sitesearch360.com/plugin/bundle/0000.js"></script>Remember that the script is supposed to go before the closing </body> tag and that the last four digits vary from project to project, so you'll need to get your own line of code rather than paste the one from this guide to your website.
Using existing search bar(s) vs adding a new one
As stated before, you can use our new fully automated Search Designer with either a new search bar or an existing one.
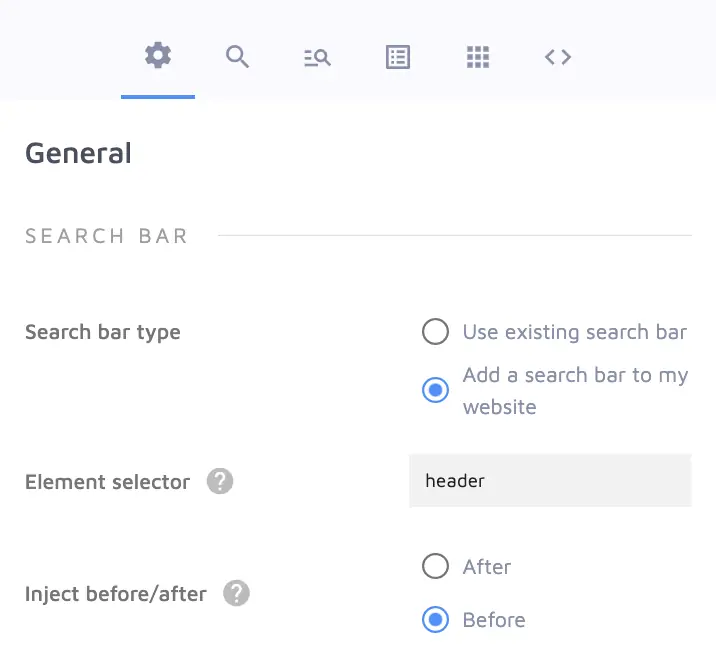
If you want to replace your old search bar, you can now rely on our script to inject it before or after a specific element on your website, such as your site header with the "Add a search bar to my site" option:
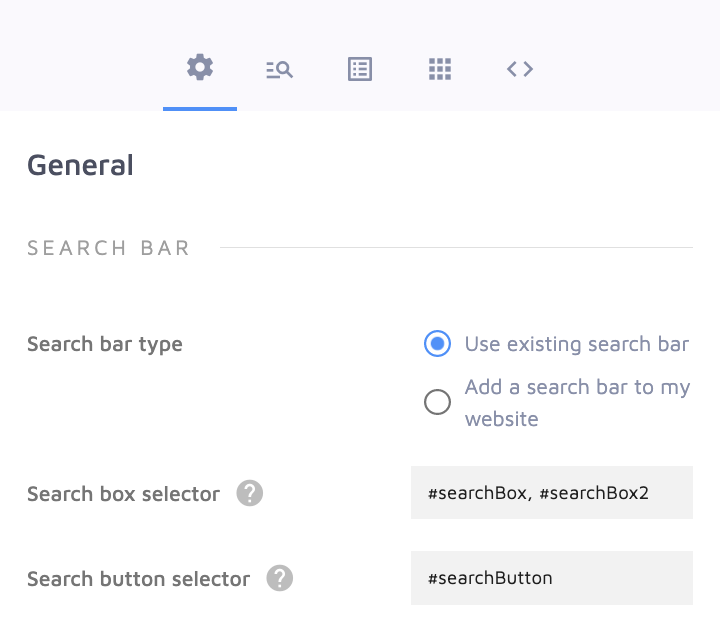
"Use the existing search bar" is in no way better or worse. It all depends solely on your preferences and needs, although if you have multiple search bars, you'll definitely have to opt for this setup while double-checking that the respective CSS selectors point to all search boxes that should be connected to Site Search 360.
If you've previously added our default code snippet to add a search field to your site and you choose to stick with it, make sure to leave its configuration untouched when you replace your old SS360 script with the new one. The following line of code will have to stay present in your HTML structure:
<section role="search" data-ss360="true">
<input type="search" id="searchBox" placeholder="Search…">
<button id="searchButton"></button>
</section>
Advanced Configuration options
Our new Search Designer comes with quite a few perks for the more tech savvy users.
The “Advanced Configuration” tab allows you to, for example, override the default style of the search box if it doesn’t fit your website’s aesthetic by customizing "Additional CSS". You will also be able to add any and all custom callbacks your heart desires.
And if the current Search Designer controls don't cover some settings you’d like to implement, you can always add them manually under "Plugin Configuration" (where your entire configuration can be viewed and edited).
------------------
Why is it worth upgrading?
Everything’s clearer in comparison, so let’s summarize what we’ve learned thus far.
BEFORE:
Every time you wanted to add or change a configuration setting (e.g. enable filters, show/hide suggestions, change from list to grid result view, etc.), you had to go and manually add and/or adjust these elements in your website’s code.
Every major upgrade of our search script required you to manually replace the old script (e.g. v12) with the new one (v13), which is quite tedious.
NOW:
Once you replace the old scripts with one line of code just this once, all subsequent changes to your search interface and settings will be handled directly in the SS360 Control Panel and in our new Search Designer. All you need to do is click "Publish", and the changes will be instantly implemented. No dev support required!
We’ll have a much easier time helping you with your troubles, since we won’t have to comb through your website’s code anymore! Everything will be readily available for analysis and tinkering on our very own platform.
All new features as well as bug fixes will be deployed to this latest script only whereas v13 and older versions are no longer as thoroughly maintained.
If you’d like to learn more about our new Search Designer’s features, you can check out our dedicated blog post.
And if anything’s still unclear or you simply need help with the Installation process, don’t hesitate to reach out to us!